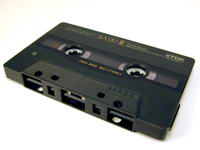
The Ways to Encode Audio Cassette Tapes to MP3 Format or MP3 Compact Disc
Nowadays majority of people has switched to using CDs instead of obsolete media like magnetic tapes. The wide-spread MP3 format doesn't really need to be introduced, as everybody knows its advantages including low hard disk space consumption and reasonably high audio quality. MP3 format is playable on virtually every portable player (for example, Creative Zen, iPod, iRiver and cell phones).
 So maybe some of you wondered if there was a way to transfer your favorite tape recordings to digital MP3 format or put them on a CD. This is a wonderful idea, as by doing so you protect your tape recordings from aging and of course you can take those records anywhere without the need of carrying cassettes. In fact, this operation can be a piece of cake if you set up everything properly. Read and observe the following instructions and you will convert your records to MP3 without any problem:
1. Before you start, get yourself audio recording software that will perform recording and encoding. Unfortunately, Sound Recorder shipped with Windows doesnтАЩt allow recordings longer than 60 seconds. For this reason, Windows Sound Recorder is not suitable for the purpose of converting whole audio cassette into MP3 format. Other software that suits such purpose will be discussed a little later.
2. Establish cable connection. Insert one side of the cable to Line In jack of the sound card of your PC, and the other side to Line Out jack (or headphones socket) of the cassette player. If you are not able to own the right cable, refer to your local hardware retailer, it isnтАЩt expensive at all. The sound data will be transferred between the player and recording software by means of this cable.
3. Start the recording program on your PC. Open its options window and choose "Line In" as the source of recording. Press the "play" button on your cassette player and the "record" button in your recording software. Now recording is started and can be monitored.
4. As soon as recording is finished, use the programтАЩs (automatic or manual) function to separate recorded MP3 on a 1 file per track basis. If you ignore this step, you will end up having one big file which cannot be navigated conveniently if you want to listen to particular track.
5. Once you are done with separating files, there are options like burning an MP3 CD or an Audio CD. You can as well transfer recorded MP3s to any portable device (refer to manual of that device for instruction).
When setting bitrate for MP3 file, stick to higher bitrates (starting from 128 kbps) in order to achieve the best quality